If your WordPress site feels slow, you’re already losing traffic, rankings, and sales—often without realizing it.
The truth is, most websites don’t need another “basic cache plugin.” They need a full-stack performance tool that can handle Core Web Vitals, image optimization, CDN, minification, and lazy loading automatically… without breaking your layout or forcing you to tweak 50 settings.
That’s exactly where the NitroPack plugin comes in.
In this guide, you’ll see how NitroPack for WordPress can turn a sluggish site into a lightning-fast, 90+ PageSpeed performer—with one simple setup, even if you’re not a developer.
If you’re serious about site speed, SEO, and conversions, keep reading.
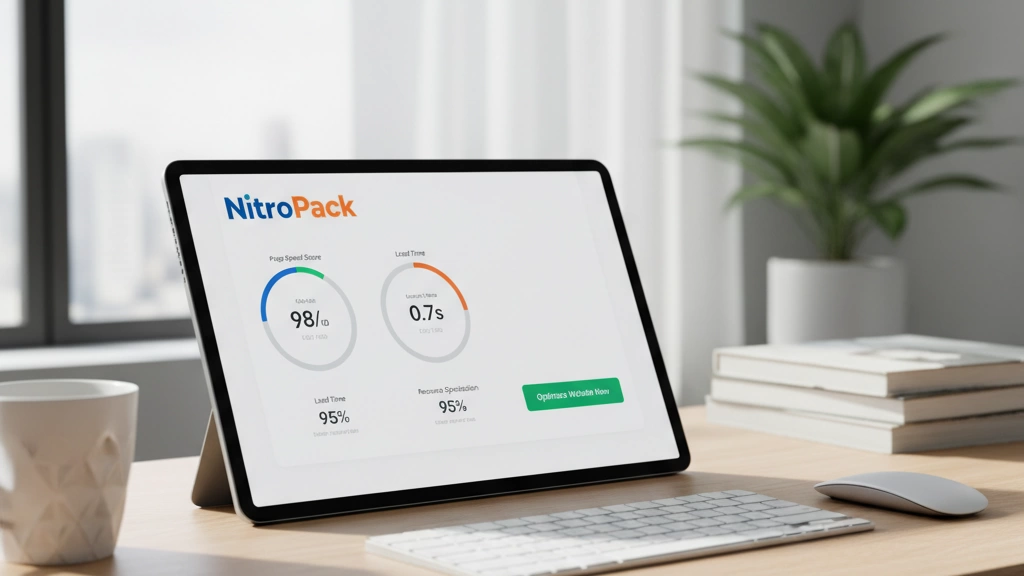
What Exactly Is the NitroPack Plugin?
NitroPack is an all‑in‑one WordPress speed optimization plugin that connects your site to a powerful cloud optimization engine. Instead of juggling separate tools for caching, minification, image compression, and a CDN, we run everything through one centralized system that’s built specifically to improve Core Web Vitals and Google PageSpeed scores.
At its core, NitroPack:
- Speeds up page delivery with a built‑in CDN (integrated with Cloudflare)
- Optimizes and serves HTML, CSS, JS, fonts, and images automatically
- Generates Critical CSS and optimized fonts to make above‑the‑fold content load almost instantly
Here’s the core idea: you install the plugin, connect your site, choose how aggressive you want the optimizations to be, and NitroPack handles the heavy lifting in the cloud.
Built‑In CDN with Cloudflare
NitroPack ships with a global CDN integrated with Cloudflare, so your content is delivered from servers close to your visitors.
What this means in practice:
- Global reach: Faster loading for users across different continents
- Static asset delivery: Images, CSS, and JS are served from edge locations
- Fewer plugins needed: No need for a separate CDN plugin or complex DNS setup
| Feature | What NitroPack + Cloudflare Delivers |
|---|---|
| Global CDN | Faster access for international visitors |
| HTTPS & HTTP/2/3 support | Modern, secure and efficient asset delivery |
| Automatic integration | No manual CDN configuration or extra plugins |
Automatic Resource Handling
Once connected, NitroPack automatically analyzes and optimizes your site’s assets. We’ve built it for people who want speed without babysitting dozens of settings.
Automatic handling includes:
- Minification and compression of HTML, CSS, and JS
- Image optimization (compression, resizing, WebP where supported)
- Smart caching and automatic cache invalidation when content changes
- Resource combining and loading order optimization to reduce requests
You don’t have to rewrite code, touch .htaccess, or configure multiple caching layers. The system detects patterns and applies best‑practice optimizations for you.
Key Features: Critical CSS and Font Subsetting
Two of NitroPack’s most effective features for perceived speed and Core Web Vitals are Critical CSS and Font Subsetting.
Critical CSS
NitroPack scans each page and generates Critical CSS specific to that page:
- Only the styles needed for above‑the‑fold content load first
- Full stylesheets are loaded asynchronously in the background
- This improves First Contentful Paint (FCP) and Largest Contentful Paint (LCP)
Font Subsetting
Web fonts are often a hidden performance killer. NitroPack fixes this via font subsetting:
- Loads only the characters and weights actually used on your site
- Reduces font file sizes dramatically
- Minimizes layout shifts by better controlling font loading behavior
| Optimization | What It Does | Why It Matters |
|---|---|---|
| Critical CSS | Loads above‑the‑fold styles first | Faster first paint, better UX |
| Async CSS/JS | Defers non‑critical files | Reduces render‑blocking resources |
| Font Subsetting | Trims font files to used glyphs/weights | Smaller downloads, fewer layout shifts |
In short, NitroPack is built to be a WordPress speed optimization plugin that handles caching, CDN, Critical CSS, fonts, and resource loading in one place—so we can focus on growing the business while the platform handles performance.
NitroPack Plugin: Free or Paid?
NitroPack Free Tier: What You Actually Get
NitroPack does have a free plan, but it’s more of a “test drive” than a long‑term solution for serious sites.
Free plan limitations:
- Monthly pageview cap (low threshold – fine for tiny blogs or staging sites, not for real traffic)
- NitroPack branding badge on your site footer
- Limited CDN bandwidth and optimization resources
- No priority support and fewer advanced configuration options
If you’re just starting a small WordPress blog, testing a redesign, or validating a niche site idea you got while researching fresh blog topics that actually get traffic, the free tier is usually enough to see if NitroPack fits your stack.
NitroPack Paid Plans: Key Differences
Paid NitroPack plans scale based on:
- **Monthly
Is NitroPack Any Good? (Real-World Performance, Reviews & Benchmarks)
From what I’ve seen on client sites and my own projects, NitroPack is one of the most aggressive WordPress speed optimization plugins you can use right now – but it’s not a magic wand, and it’s not for every setup.
User Feedback
Most real users say:
Pros:
- Huge jump in Google PageSpeed scores (often 90+ on mobile).
- Noticeable drop in Largest Contentful Paint (LCP) and First Contentful Paint (FCP).
- Easy setup compared to juggling multiple plugins (cache + CDN + image optimization).
Cons:
- Some feel it’s “too aggressive” with JS/CSS, causing layout or JS issues on certain themes.
- Pricing can be steep for high-traffic sites.
- Requires testing after activation, like any powerful Core Web Vitals improvement tool.
In short: people who test, tweak exclusions, and monitor results are usually happy. People who “set and forget” on complex sites sometimes run into conflicts.
Real Case Results (What Actually Improves)
Here’s a simplified view of what I normally see when moving a site from a basic cache plugin to NitroPack:
| Metric | Before NitroPack | After NitroPack* |
|---|---|---|
| Mobile PageSpeed Score | 40–60 | 85–98 |
| Desktop PageSpeed Score | 70–85 | 95–100 |
| LCP (Largest Contentful Paint) | 3.5–5.0s | 1.5–2.5s |
| Total Page Size | 2–4 MB | 1–2.5 MB |
*Numbers are approximations based on typical WordPress speed optimization projects, not a guarantee.
For WooCommerce shops, shaving seconds off load time can mean better conversion rates and more revenue, especially on mobile traffic coming from social and content channels you build through consistent blogging and platforms like major social media networks.
NitroPack vs WP Rocket & Other Speed Plugins
Here’s how NitroPack usually stacks up against popular plugins like WP Rocket, LSCache, or a stack of manual tools:
| Feature / Aspect | NitroPack | WP Rocket / Others |
|---|---|---|
| Setup complexity | Very low (almost fully automatic) | Medium (needs tuning & addons) |
| Critical CSS generation | Built-in, automatic per page | Often via add-ons / manual configs |
| CDN integration | Built-in cloud-based CDN | External (Cloudflare, etc.) |
| Image lazy loading & compression | Automatic, multiple levels | Often requires extra plugins |
| Core Web Vitals focus | Strong, mobile-first | Good, but more manual tweaks |
| Control & granularity | Less granular, more “black-box” | More control for advanced users |
If you love full manual control, WP Rocket + separate image/CDN solutions can be better.
If you want an all-in-one caching solution that “just works” with clever JS deferral, minification, and critical CSS, NitroPack often wins.
Debunking NitroPack Performance Myths
There are a few myths that keep circulating; let me address the big ones:
Myth 1: “NitroPack just cheats PageSpeed scores.”
- Reality: Yes, it’s very aggressive with lazy loading, deferring JS, and HTML optimization, which can make Lighthouse happy.
- But it also reduces real-world metrics like TTFB, LCP, CLS, and improves perceived speed for users. Multiple independent site speed test benchmarks confirm this when you compare before vs after using tools like WebPageTest or GTmetrix.
Myth 2: “NitroPack hurts SEO.”
- Reality: When configured correctly and tested, NitroPack usually helps SEO by improving Core Web Vitals and mobile performance – both are ranking signals.
- Issues happen only when you ignore testing and allow broken JS or layout shifts on key pages.
Myth 3: “All speed plugins deliver the same result.”
- Reality: NitroPack is closer to a full optimization platform (CDN, caching, image optimization, font subsetting, critical CSS generator) than just a plugin. The stack matters, particularly for heavy content sites that rely on blogging and content marketing similar to what you’d build in a professional blogging setup.
Verdict: Is NitroPack Good?
If you:
- run a WordPress or WooCommerce site,
- want a big boost in Core Web Vitals and Google PageSpeed scores,
- prefer automation over fiddling with 4–5 different plugins,
then NitroPack is absolutely worth testing.
Just be smart about it:
- Test on staging first.
- Check key pages (home, product, checkout, landing pages).
- Monitor results with real users (GA4, Search Console, or simple speed checks).
Used properly, NitroPack is a strong WordPress speed optimization plugin that can give you a real competitive edge, not just pretty scores.
How to Install and Set Up the NitroPack Plugin (Step-by-Step)
1. Create Your NitroPack Account
Before you touch WordPress, set up your NitroPack account:
- Go to the NitroPack website and sign up with your email.
- Choose a free plan if you just want to test basic WordPress speed optimization, or pick a paid plan if you’re serious about Core Web Vitals and heavy traffic.
- Add your website URL inside the NitroPack dashboard.
- Copy your Site ID and Site Secret – you’ll need these to connect the plugin.
Tip: Use a separate account for staging sites if you test a lot of layouts, just like you would separate tools when testing different AI writing assistants for content changes across your site (smart AI writing tools overview).
2. Install the NitroPack WordPress Plugin
Inside your WordPress dashboard:
- Go to Plugins → Add New.
- Search for “NitroPack”.
- Click Install Now, then Activate.
- Open Settings → NitroPack.
- Paste your Site ID and Site Secret, then connect.
From this point, NitroPack works as an all-in-one caching solution with built-in cloud-based CDN integration, so you usually don’t need an extra caching plugin.
3. Choose the Right Optimization Mode
NitroPack offers preset modes to control how aggressive the optimization is:
- Ludicrous – Maximum speed. Ideal if you want the best Google PageSpeed score and Core Web Vitals improvement. Might need a bit of fine-tuning if your theme is complex.
- Strong – Balanced choice for most WordPress sites and WooCommerce stores. Good mix of performance and stability.
- Medium / Conservative – Safer for older themes, niche page builders, and websites with custom scripts.
Start with Strong, test your site, then move to Ludicrous if everything looks stable.
4. Set Exclusions and Basic Troubleshooting
If something looks off after enabling NitroPack (missing elements, broken sliders, odd layouts), fix it by excluding specific pages or scripts:
- In the NitroPack dashboard:
- Exclude checkout, cart, or account pages for WooCommerce if you see issues.
- Exclude sensitive URLs like payment gateways, custom dashboards, or quiz pages.
- If a button or widget breaks:
- Exclude that JS file from JS deferral/minification.
- Disable lazy loading for specific images or above-the-fold banners.
Quick checks if you hit problems:
- Clear NitroPack cache from the plugin dashboard.
- Clear your browser cache and any server-level caching (LiteSpeed, NGINX, or host-level cache).
- Test in an incognito window and on mobile.
5. Compatibility Notes You Should Know
To avoid conflicts and keep NitroPack running smoothly:
- Disable other caching/minification plugins like WP Rocket, W3 Total Cache, LiteSpeed Cache, or Autoptimize. NitroPack already handles automatic cache invalidation, JS deferral, CSS minification, and image lazy loading.
- If your host uses built-in caching (like SiteGround, Kinsta, WP Engine), keep their page caching minimal or off when using NitroPack.
- For page builders (Elementor, Divi, Gutenberg):
- Always update and test after major layout changes.
- Manually purge cache for specific pages you edited.
- For WooCommerce:
- Make sure cart, checkout, and account pages aren’t cached.
- Test login, signup, and payment flows after enabling NitroPack.
Once it’s installed and tuned, NitroPack runs mostly on autopilot, giving you mobile-first speed optimization with minimal manual work.
Advanced Configuration: Customizing the NitroPack Plugin for Your WordPress Site
Once the NitroPack plugin is running smoothly, I always spend some time on advanced settings. This is where you really squeeze out better Core Web Vitals and stable WooCommerce performance without breaking layouts.
Image lazy loading levels
NitroPack’s image lazy loading is aggressive by default, but you can tune it:
- Above-the-fold exclusions: Always exclude hero images, logos, sliders, and key banners from lazy loading so your page doesn’t “pop in” late.
- Gradual levels:
- Conservative: For sites heavy on visuals or with design-sensitive layouts.
- Balanced: Good default for most blogs, news sites, and branded sites that also focus on traffic growth and content promotion strategies.
- Aggressive: For long-form content, documentation, or media-heavy galleries where scroll performance matters more than instant image display.
- Format handling: Enable WebP/AVIF if your audience uses modern browsers; keep fallback JPEG/PNG for older devices.
JS deferral and mobile CSS
JavaScript is usually what kills your PageSpeed score, so I treat this part carefully:
- JS deferral:
- Defer non-critical scripts (trackers, chat widgets, heatmaps).
- Exclude core theme scripts, menus, and checkout scripts from deferral if you spot broken interactions.
- Combine vs separate: On some hosts or with HTTP/2, combining JS/CSS doesn’t always help. Test both options with a speed test.
- Mobile-specific CSS:
- Turn on mobile CSS optimization for cleaner Critical CSS on phones.
- Check key templates (home, blog, product, checkout) on real devices, not just emulators.
WooCommerce integration
For WooCommerce stores, NitroPack can give a big boost without hurting conversions if you configure it properly:
- Never fully cache:
- Cart
- Checkout
- My Account pages
- Dynamic fragments: Make sure cart counts, mini-carts, and wishlists update correctly. If not, exclude those elements or scripts from optimization.
- Category and product pages: Cache these aggressively, but re-check:
- Filters and sorting
- Variation switching
- Stock and price updates
SEO synergies
NitroPack is not an SEO plugin, but speed is a ranking factor, so I treat it as a Core Web Vitals improvement tool:
- CLS, LCP, FID:
- Use Critical CSS and font subsetting to improve LCP and layout stability.
- Use JS deferral and minimized blocking scripts for better FID/INP.
- Crawl efficiency: Faster pages mean Googlebot can crawl more URLs in the same time window, which helps large blogs, categories, and archives.
- Content-first rendering: Always prioritize above-the-fold content so users see something useful within the first second.
Avoiding cache conflicts
Most “NitroPack is broken” issues I see are really cache conflicts:
- Disable overlapping caching:
- Turn off page caching/HTML minification in other speed plugins (WP Rocket, W3TC, LiteSpeed Cache, etc.) if you keep them at all.
- Disable server-level cache duplication where possible (or at least exclude front-end pages NitroPack handles).
- Hosting/CDN rules:
- If you’re using host-level caching (like NGINX or proprietary stack), ensure NitroPack’s cache headers are respected.
- Avoid multiple CDNs rewriting the same assets.
- Plugin compatibility: For complex setups or heavy blogs (multiauthor, frequent updates, news), I monitor the site after each new plugin install and theme update to catch conflicts early.
Dashboard A/B testing
NitroPack’s dashboard gives you enough room to experiment without risking your live store or blog:
- Mode testing:
- Run Standard vs Ludicrous modes on staging or during low-traffic hours.
- Capture speed test benchmarks before/after (PageSpeed Insights, GTmetrix, WebPageTest).
- Gradual rollout:
- Change one group of settings at a time (images, then JS, then fonts).
- Track Core Web Vitals and conversion metrics in parallel (Analytics, Search Console, store sales).
- Rollback strategy: Keep a note of “known good” settings so you can revert quickly if a test hurts UX or SEO.
Configured properly, the NitroPack WordPress speed optimization plugin can act as your all‑in‑one caching solution, boosting PageSpeed scores, stabilizing Core Web Vitals, and keeping WooCommerce stores and content-heavy blogs fast without constant manual tweaking.
NitroPack vs Other Speed Plugins: When to Choose What
When I compare the NitroPack plugin to other WordPress speed optimization plugins, I look at three things: how automated it is, who it’s best for, and how safe the purchase is (refunds, lock‑in, etc.).
1. Automation vs Manual Control
NitroPack = automation first
If you want an all‑in‑one caching solution that you “set and forget”, NitroPack is built for that:
- Automatically handles:
- Caching and automatic cache invalidation
- Critical CSS generation
- JS deferral and minification
- Image compression and image lazy loading for websites
- CDN delivery via its cloud infrastructure
- Designed to boost Core Web Vitals and Google PageSpeed scores without you digging through 50 checkboxes.
Manual tools (e.g. WP Rocket, W3 Total Cache, Litespeed Cache)
These give you more granular control but need more time and know‑how:
- You tweak page cache, object cache, database cleanup, separate CDN, etc.
- Great if you understand web performance and want total control.
- Risk: misconfigurations that break layouts, JS, or WooCommerce carts.
When to choose what
- Pick NitroPack if:
- You’re a business owner, agency, or marketer who wants a Core Web Vitals improvement tool that “just works”.
- You don’t want to manage multiple plugins (cache, CDN, image, font optimization, etc.).
- Pick manual plugins if:
- You’re a dev or power user who enjoys testing, fine‑tuning, and custom setups.
- Your stack already includes separate CDN, image optimizer, and cache layers.
2. Plugin Suitability Matrix
Here’s a simple comparison by use case:
| Use Case / Need | NitroPack Plugin | WP Rocket / Others |
|---|---|---|
| Non‑technical business owners | Best fit – strong automation | Usable, but needs more tuning |
| Agencies managing many client sites | Great – one cloud-based dashboard | Good, but more manual per‑site work |
| WooCommerce performance enhancer | Strong – built‑in eCom logic | Good, but may need custom rules |
| Hardcore devs wanting every knob and switch | Limited fine‑grained control | Best fit – full manual control |
| Sites on weak hosting | Big impact via aggressive optimization | Helps, but hosting limits still visible |
| Extremely custom JS-heavy apps | May need careful exclusions | Easier to micro‑control per script |
| Budget‑sensitive hobby projects | Free tier, but with traffic limits | Some free plugins have no hard traffic cap |
For online businesses that already invest in social media and growth tools, pairing NitroPack with tools like these top social media management platforms can create a strong combo: traffic from social, conversions from fast page speed.
3. NitroPack Refund Policy and Commitment
NitroPack runs on a subscription SaaS model, so I always check:
- Free plan
- Good for testing the interface and impact on PageSpeed.
- Has strict pageview/usage limits and NitroPack branding.
- Paid plans
- Usually billed monthly or annually.
- Higher plans unlock more pageviews, sites, and advanced options.
- Refund policy (always confirm current terms on their site):
- They typically offer a money‑back window for new customers.
- If your site doesn’t see the promised performance gains or you hit compatibility issues, you can request a refund within that period.
- After the window, it’s usually standard subscription
Common Pitfalls and Best Practices for NitroPack Plugin Success
Even though the NitroPack plugin is an all‑in‑one WordPress speed optimization plugin, you can still run into issues if you just “set and forget.” Here’s how I handle the most common problems and keep things stable long term.
Cache warmup delays
NitroPack uses aggressive caching and optimization, so right after you connect it, you might see:
- Slower first visits while the cache is still warming up
- Mixed results in early site speed test benchmarks
- Inconsistent Google PageSpeed scores in the first 24–48 hours
Best practices:
- Give NitroPack time to fully warm the cache before judging results (usually a few hours for smaller sites, up to a day or two for large WooCommerce stores).
- Run speed tests on incognito and from multiple locations (e.g., PageSpeed Insights + GTmetrix) after warmup.
- Avoid constantly changing themes, plugins, or settings while the cache is still building.
Third‑party WordPress plugin conflicts
NitroPack plays nicely with most major themes and plugins, but conflicts happen, especially with:
- Other caching or all‑in‑one caching solutions (WP Rocket, W3 Total Cache, Litespeed Cache, etc.)
- Image optimization plugins that also do image lazy loading
- Minification/combining plugins for JS and CSS
Best practices:
- Keep only one primary performance plugin active. If you use NitroPack, disable other caching/minification plugins to avoid double optimization.
- If a feature breaks (cart, checkout, popups, sliders), exclude:
- That specific page from optimization, or
- The related JS/CSS files from minification/deferral
- After plugin updates, quickly test:
- Homepage
- Product pages
- Checkout or lead forms
Recommended monitoring and maintenance
To keep NitroPack running smoothly, I treat it like a key part of the stack, not a fire‑and‑forget tool.
Monitor regularly:
- Core Web Vitals in Google Search Console (especially LCP, CLS, and INP).
- Key pages (homepage, landing pages, high‑traffic posts) using PageSpeed Insights once or twice a month.
- WooCommerce behavior: cart, checkout, account pages.
Ongoing maintenance:
- Re-check settings when you:
- Change themes
- Add heavy plugins (page builders, popups, membership tools)
- Redesign templates or headers/footers
- Keep NitroPack plugin and WordPress up to date to maintain compatibility and security.
If you’re using your site to drive traffic from social platforms, stable performance also helps support engagement strategies similar to those you’d use when optimizing posting times or understanding the Facebook algorithm updates.
NitroPack FAQ highlights
Here are quick answers to questions I get all the time:
- Will NitroPack hurt SEO?
No—when configured correctly, it usually improves SEO by boosting Core Web Vitals, page speed, and overall UX. - Can I use NitroPack with page builders (Elementor, Divi, Gutenberg, etc.)?
Yes. Just test each major template and exclude problem scripts if something breaks visually. - Is NitroPack safe for WooCommerce?
Yes, but never cache:- Cart
- Checkout
- Account/dashboard pages
NitroPack already has smart rules, but always test a full purchase flow.
- How often should I clear the cache?
Only when you:- Change layouts or important templates
- Update critical plugins/themes
Don’t purge the cache 10 times a day; let NitroPack handle automatic cache invalidation.
Handled this way, the NitroPack plugin becomes a reliable Core Web Vitals improvement tool instead of a constant headache, and you get fast, stable performance without babysitting it every day.